Product Details
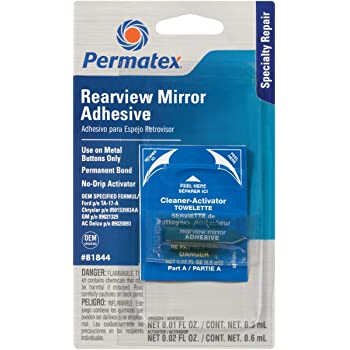
Permatex Professional StrengthRearview Mirror Adhesive
Approved and used by GM, Ford and Chrysler. Permanently remounts mirrors to windshields. Achieves handling strength in seconds; mirror-mounting strength in 15 minutes. Available in single and multi-applications. ODC-free. NOT DESIGNED FOR PLASTIC BUTTONS.
Automobile
Suggested Applications: Mounting rearview mirrors to windshields.
Description
PRODUCT DESCRIPTION
Permatex Rearview Mirror Adhesive is a two part adhesive
that permanently bonds mirror buttons to windshields.
Achieves handling strength in seconds, and mirror mounting
strength in 30 minutes. ODC free. OEM approved. NOT
designed for PLASTIC buttons.
PRODUCT BENEFITS
• Easy to use
• Fast curing
• OEM factory service specified
TYPICAL APPLICATIONS
• All foreign and domestic metal rearview mirror mounting
buttons
DIRECTIONS FOR USE
Read all directions before beginning repair. Repairs can be
made ideally at temperatures from 50F to 75F. Repairs
made at lower temperatures will take longer to cure.
1. Remove the mounting button from the mirror bracket.
2. On the outside of the windshield, mark the spot where
the button was mounted with a felt-tip marker or
crayon.
3. Scrape all old adhesive off windshield and the button
with a safety razor. (Be careful not to gouge button
with razor.)
4. Using fine grit sandpaper, put on a flat, hard surface
and gently sand the mounting surface of the button
using a circular motion.
5. Open the Cleaner/Activator towelette by pulling both
sides of the protective packet at a point at the top sides
of the package. Fold the packet back to use. The
towelette is attached to the foil packet. Do Not
Remove.
6. Apply the activator to the inside of the windshield where
the spot has been marked by the felt-tip marker. Use a
circular motion and make sure that the activator
overlaps the mark by at least ½ inch. Allow the
activator to dry for at least 2 minutes. DO NOT
TOUCH the glass after the activator has been applied.
7. Tear open the adhesive pouch at the top or use
scissors to cut open. Apply one drop only to the
center of the button. (Remember, more is not better.)
8. Immediately apply the button to the windshield,
ensuring that the correct side is up (usually the rounded
side). Hold firmly against the windshield for at least 1
minute. Do not move the button during this time. Allow
to set for at least 30 minutes.
9. Mount the mirror bracket onto the button. Clean off the
marking on the outside of the windshield with alcohol.
10. Wipe off any uncured resin with a cloth.
11. Uncured resin may be cleaned up with a cloth
saturated with alcohol.
12. Clean hands with Fast Orange hand cleaner.
| TECHNICAL DOCUMENTS |
| Permatex Professional StrengthRearview Mirror Adhesive tds |




Reviews
There are no reviews yet.